Apollo ELD Tablet Update for Drivers
Download a pdf of these instructions here
You must STOP after completing Step 4 and wait until your current duty cycle ends before
continuing to the next step.
Reminder: You will be able to delay updating your tablet twice by selecting “Remind me Later”. After delaying two times, the system will require you to complete the update.
Steps to update your tablet:
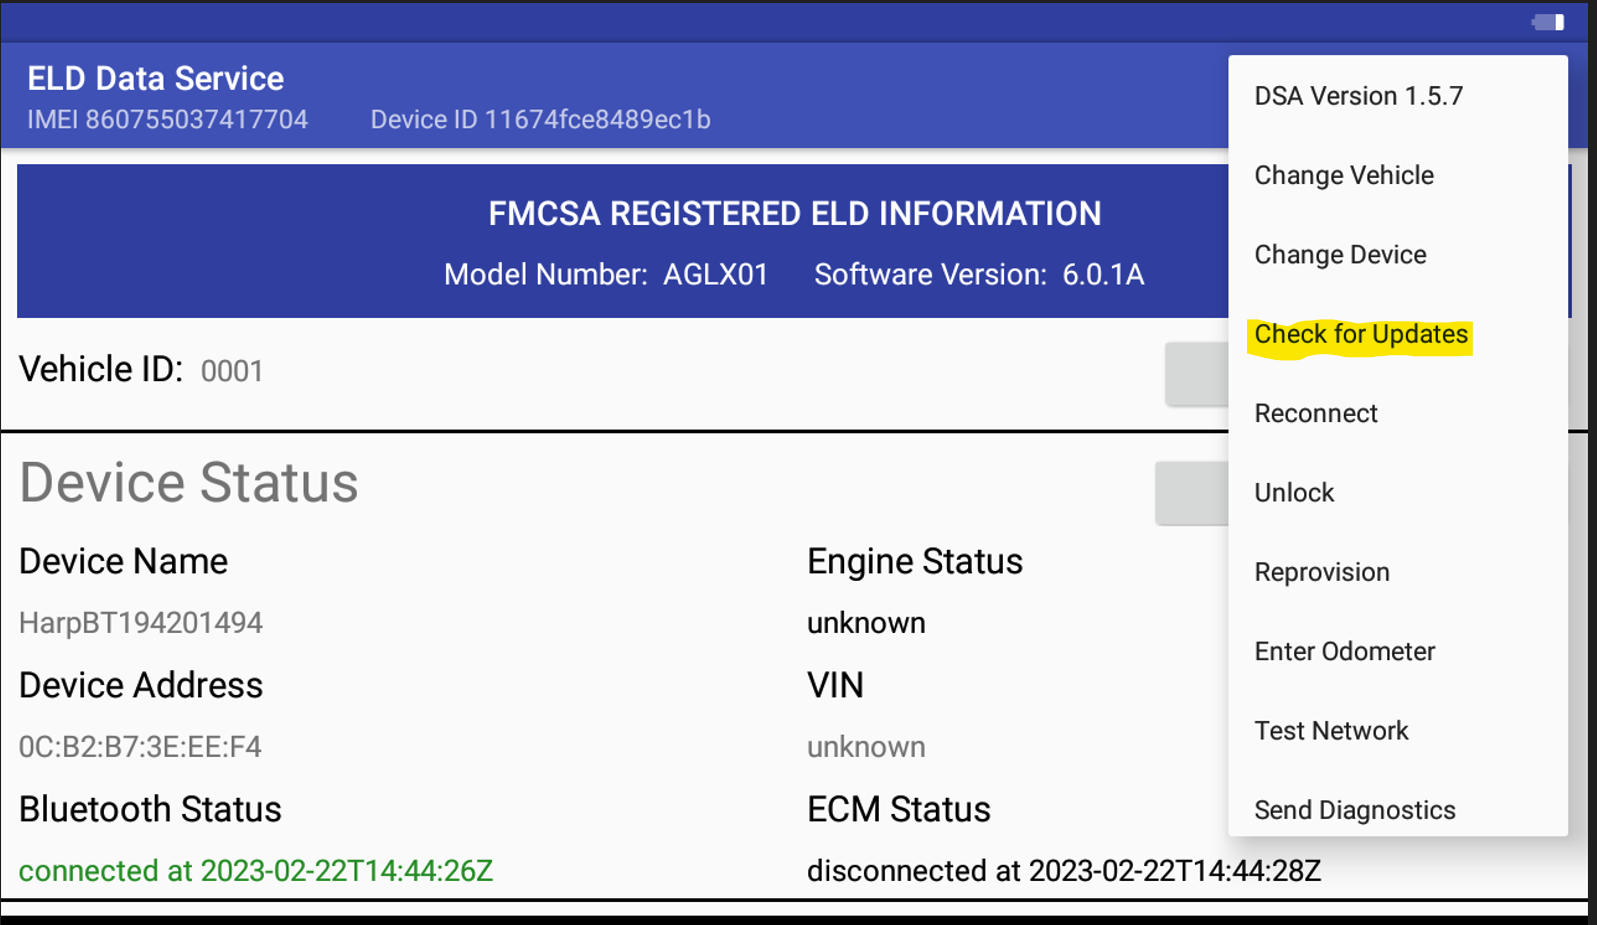
- Turn your tablet on. Once your tablet checks in with the network you will receive a notification to update your system. If you do NOT see the notification, please select “Check for Updates”.
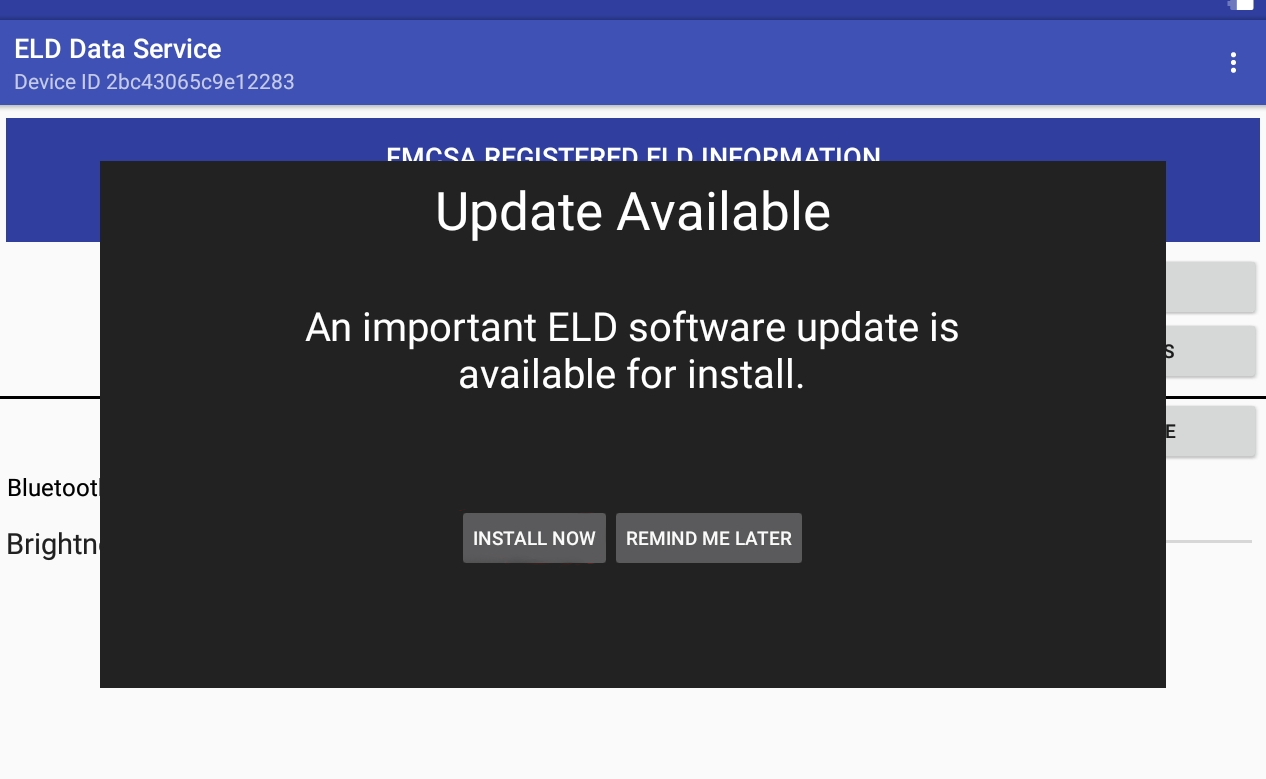
- Select “INSTALL NOW” for update available
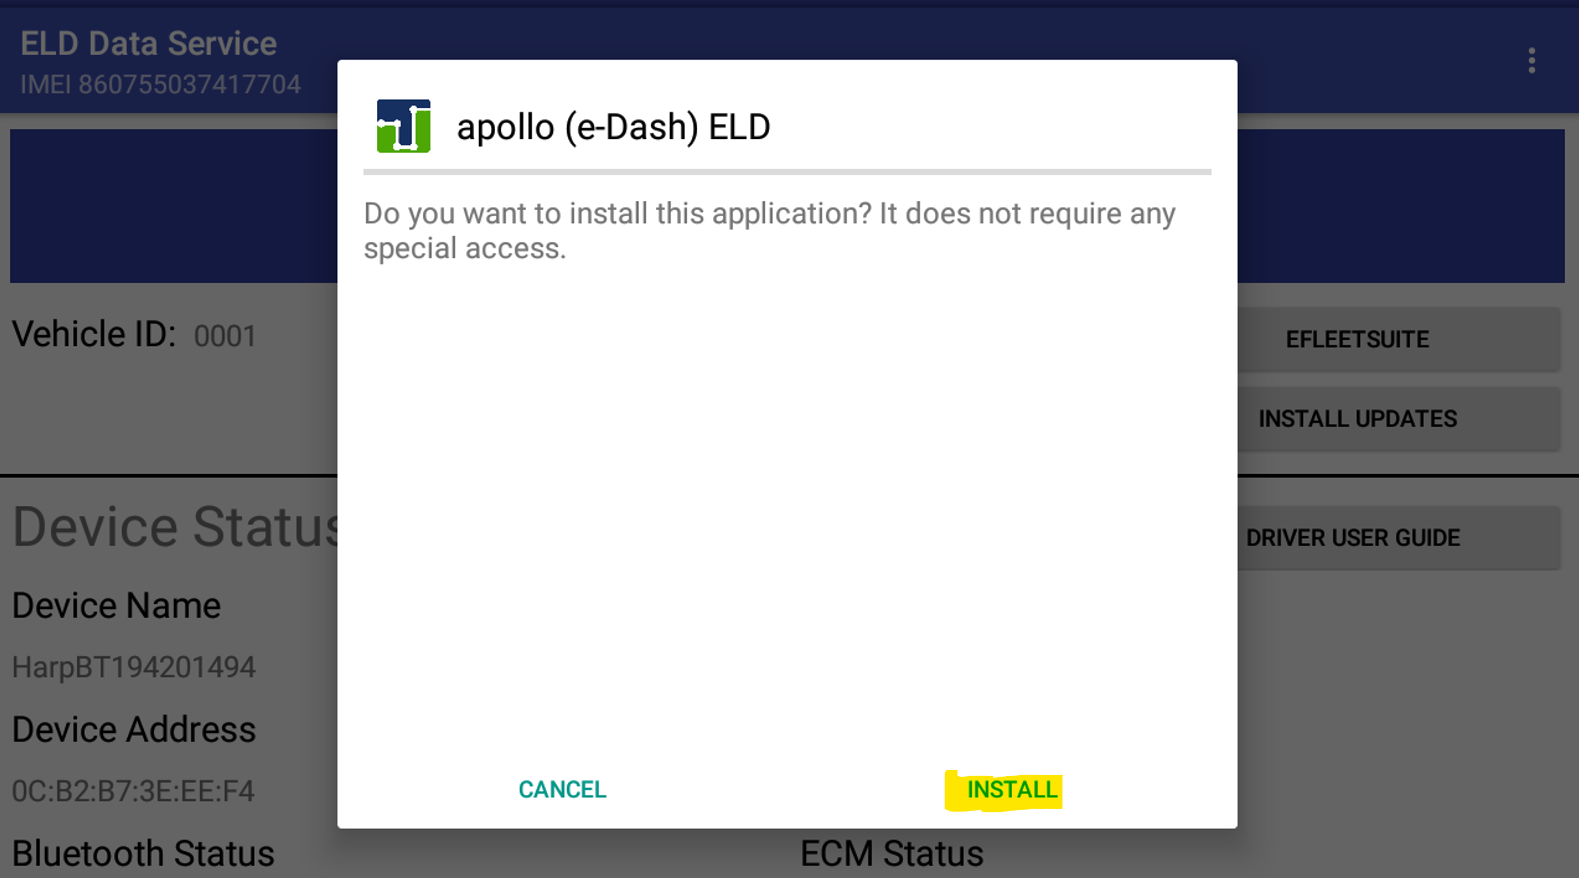
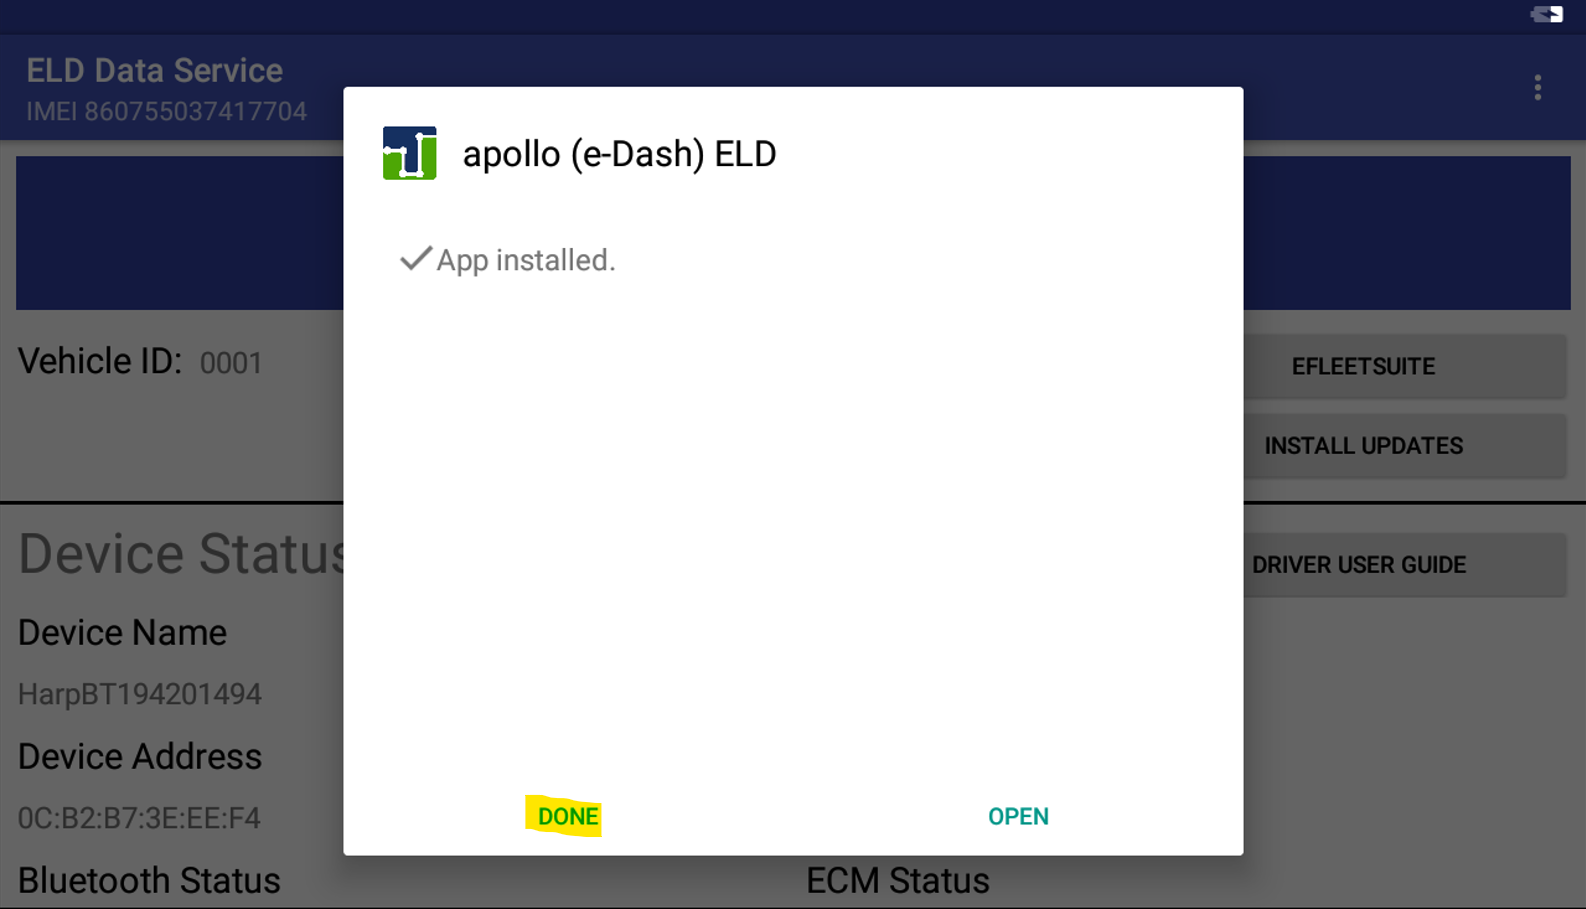
- Select “INSTALL” for Apollo ELD, then select “DONE”
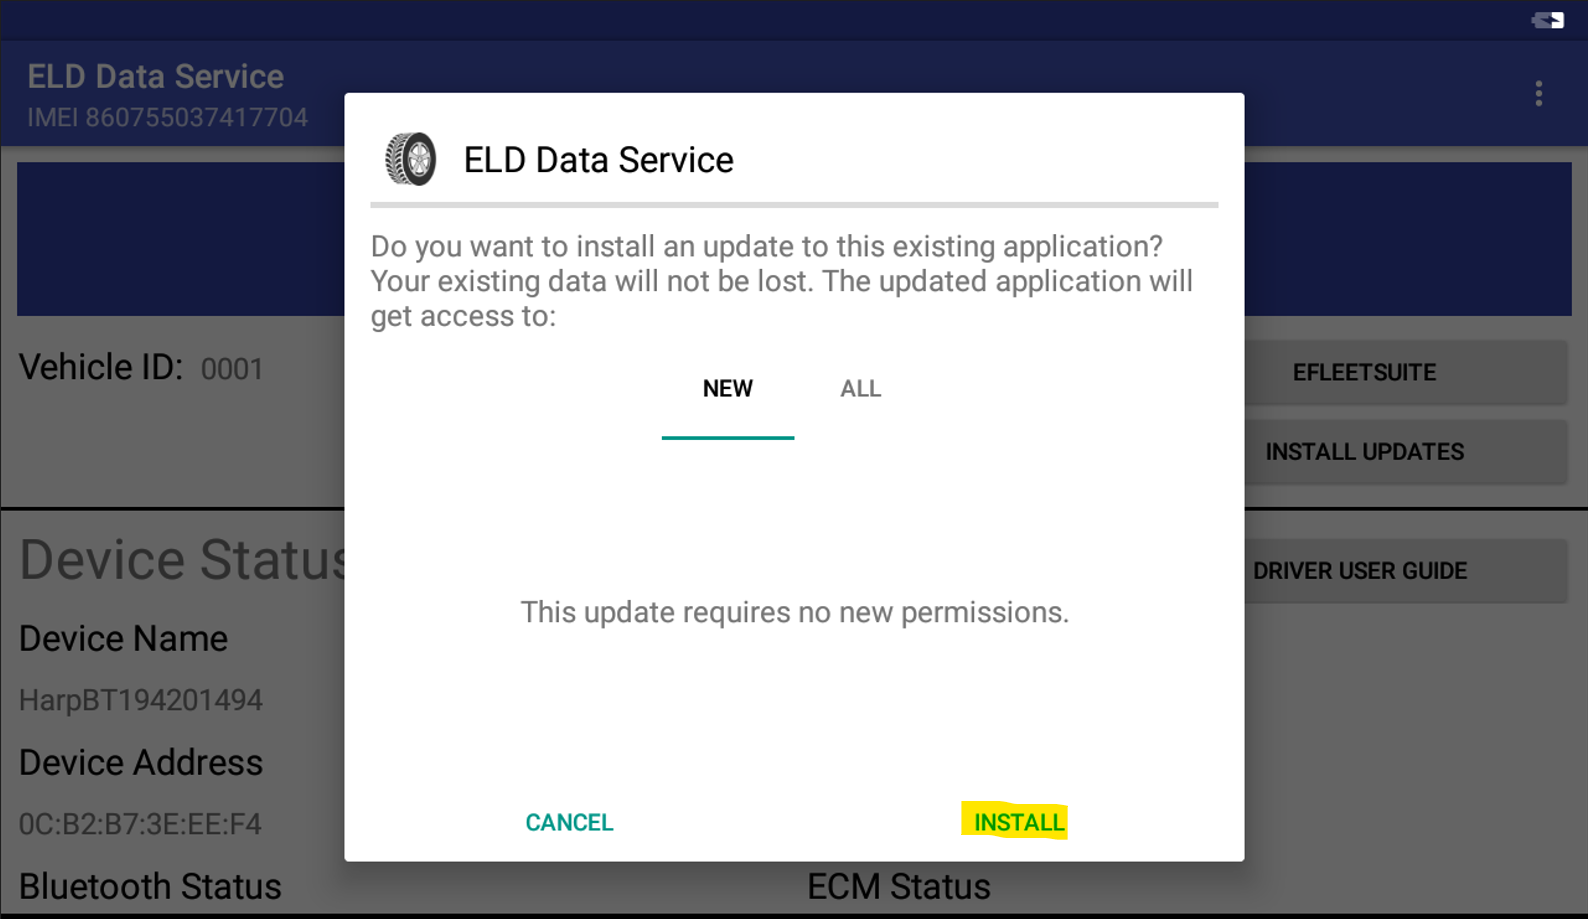
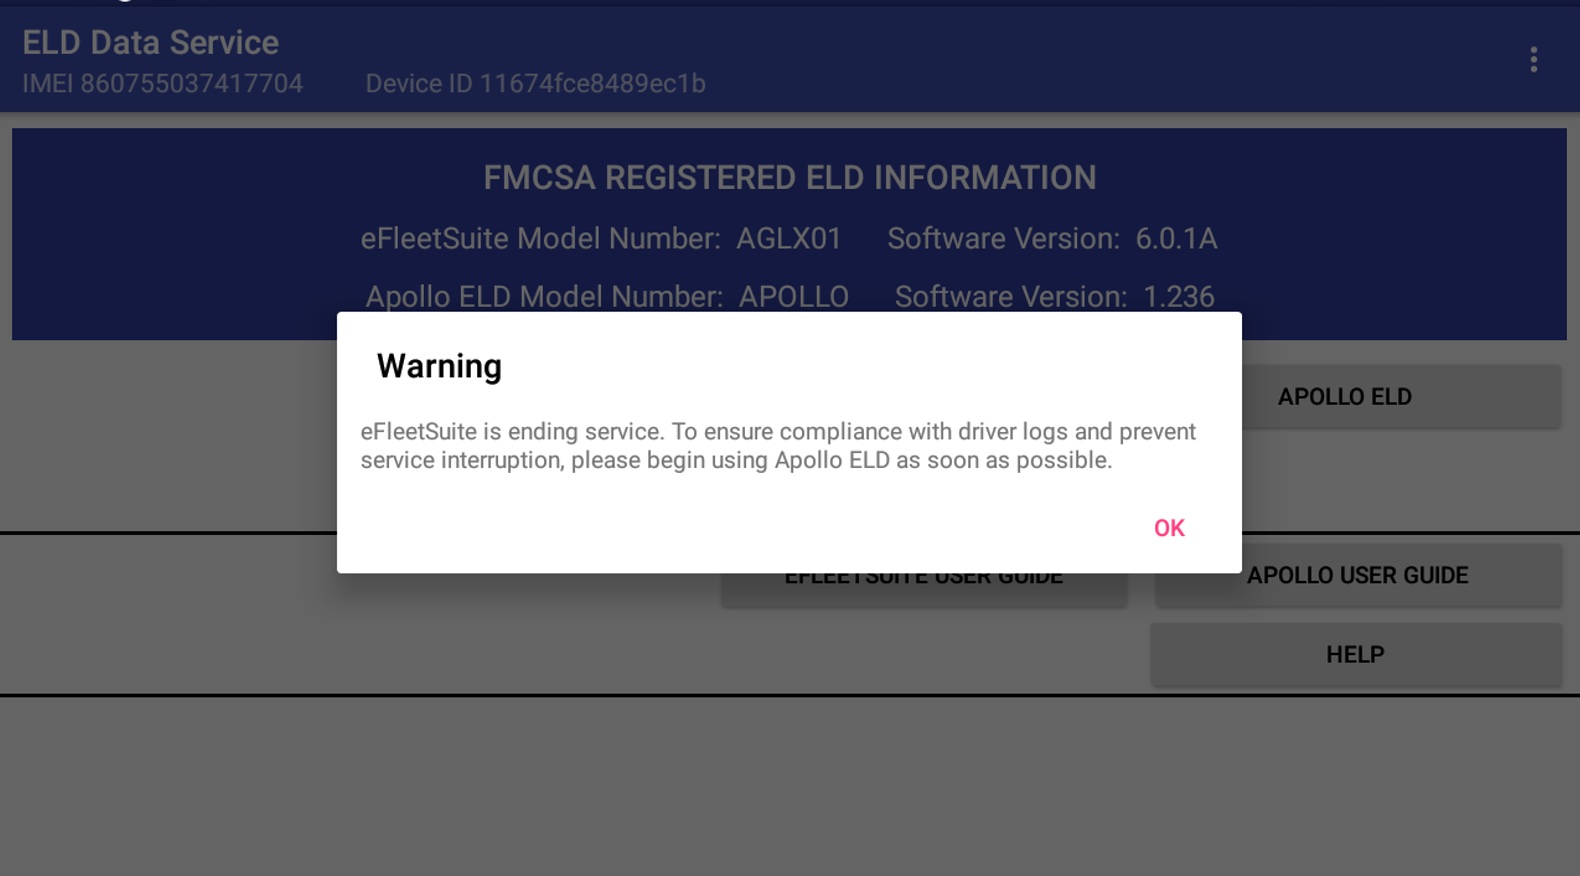
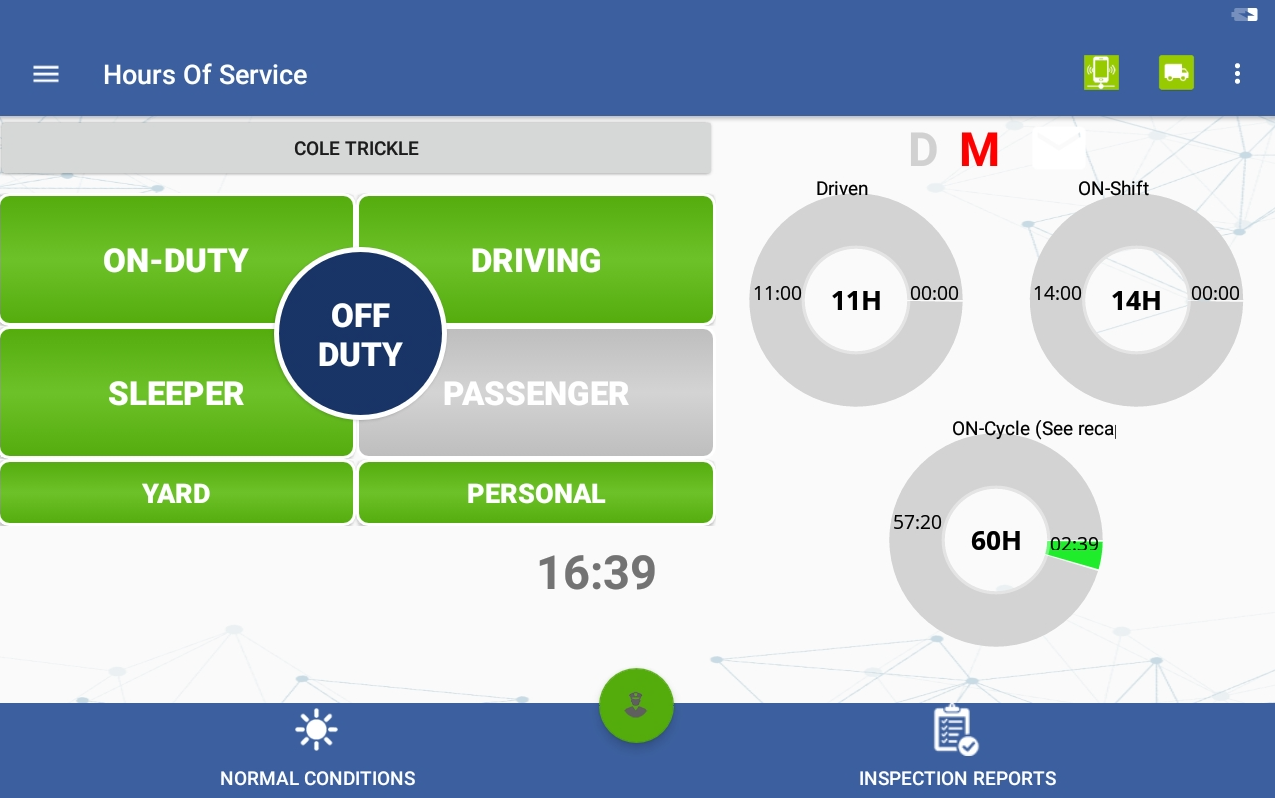
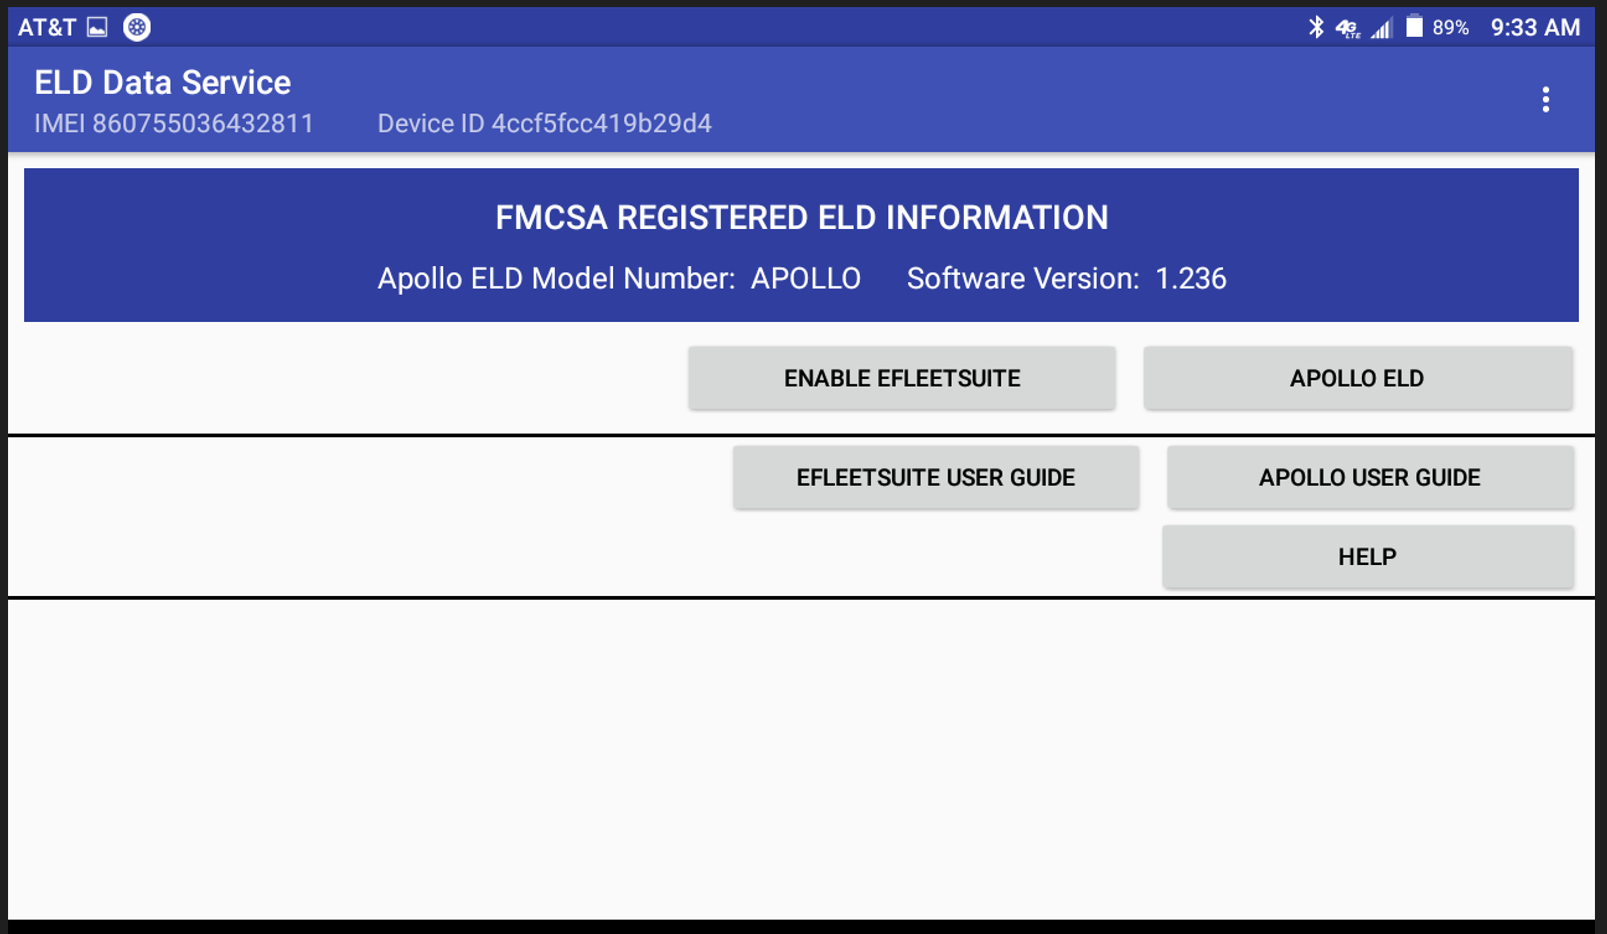
- Select “INSTALL” for ELD Data Service. You should now see options for both Apollo ELD and eFleetSuite, with the option to disable eFleetSuite. DO NOT DISABLE EFLEETSUITE UNTIL YOUR CURRENT DUTY CYCLE ENDS.
NOTE: After your tablet has been updated you will receive this message when selecting eFleetSuite. Please continue to use eFleetSuite until your duty cycle is completed.
STOP! DO NOT CONTINUE ONTO THE NEXT STEP UNTIL YOU HAVE COMPLETED YOUR CURRENT DUTY CYCLE.
Did you disable eFleetSuite before your current duty cycle
ended? If so, click here for help.
Once your current duty cycle ends:
- After your current cycle, “DISABLE” eFleetSuite. At this point, Apollo ELD should automatically connect to your existing JBUS device. If it needs to be connected manually, please click here to see the instructions to connect your tablet to a JBUS device.
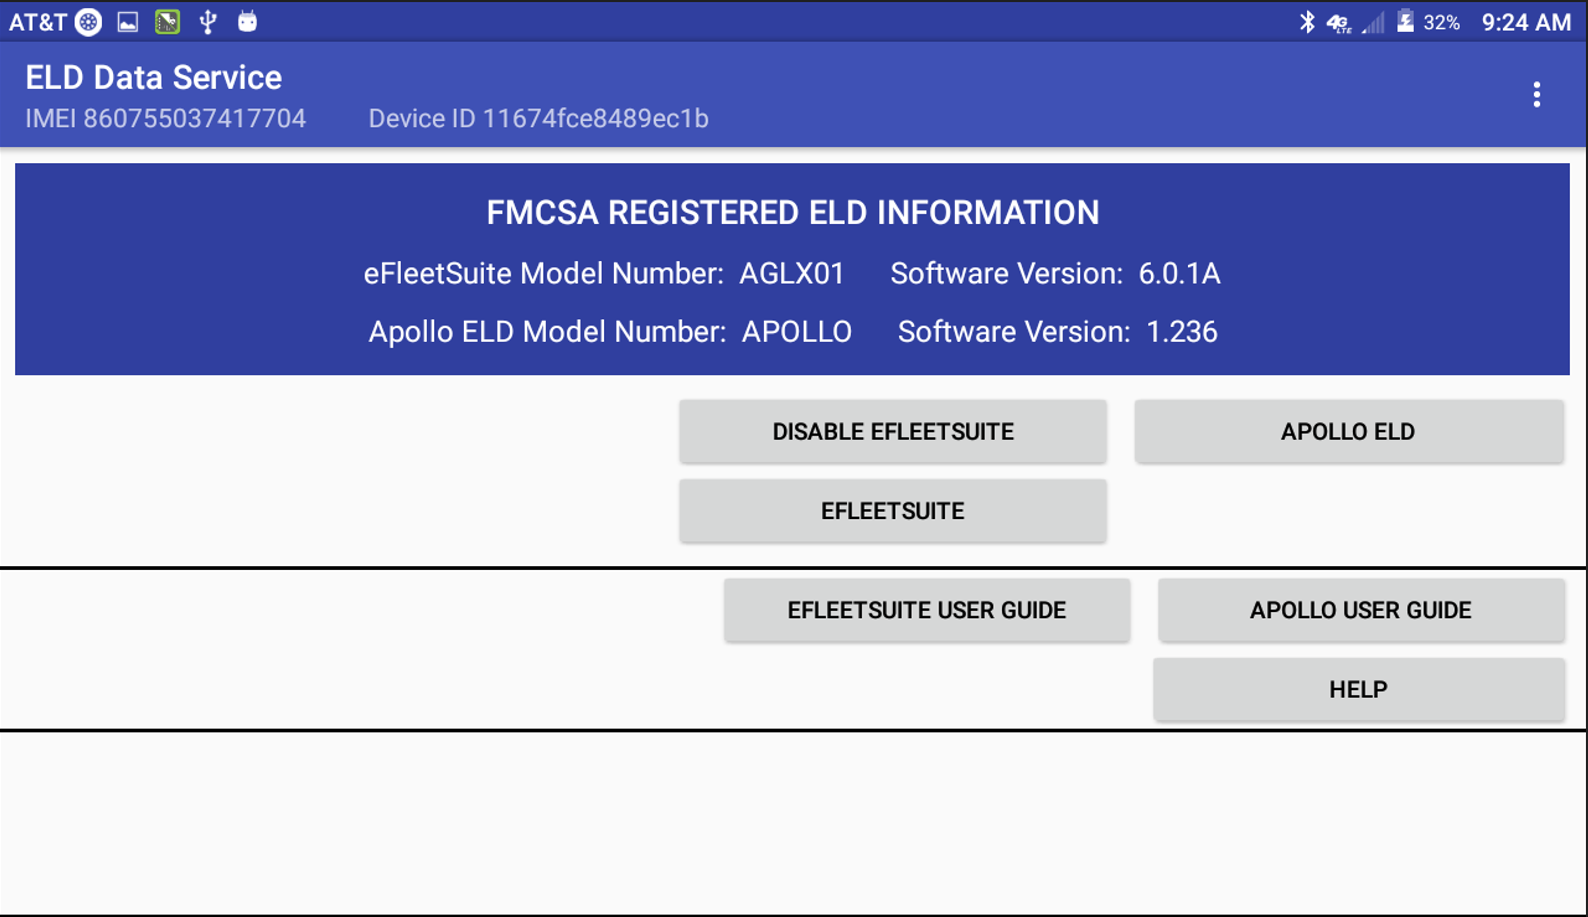
NOTE: Once you have disabled eFleetSuite, the eFleetSuite ELD button will no longer be available. Select “APOLLO ELD”.
NOTE: If you receive this message when selecting Apollo ELD after your duty cycle, please ensure eFleetSuite is disabled
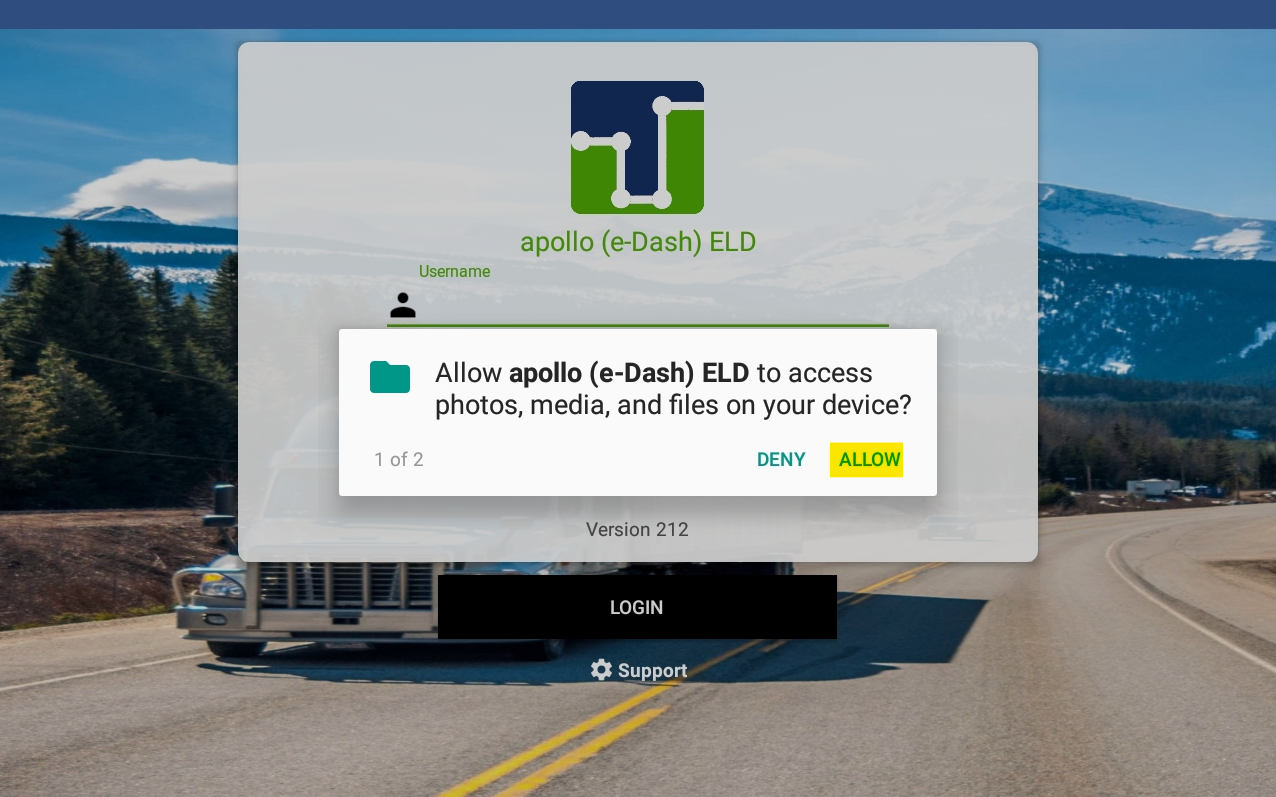
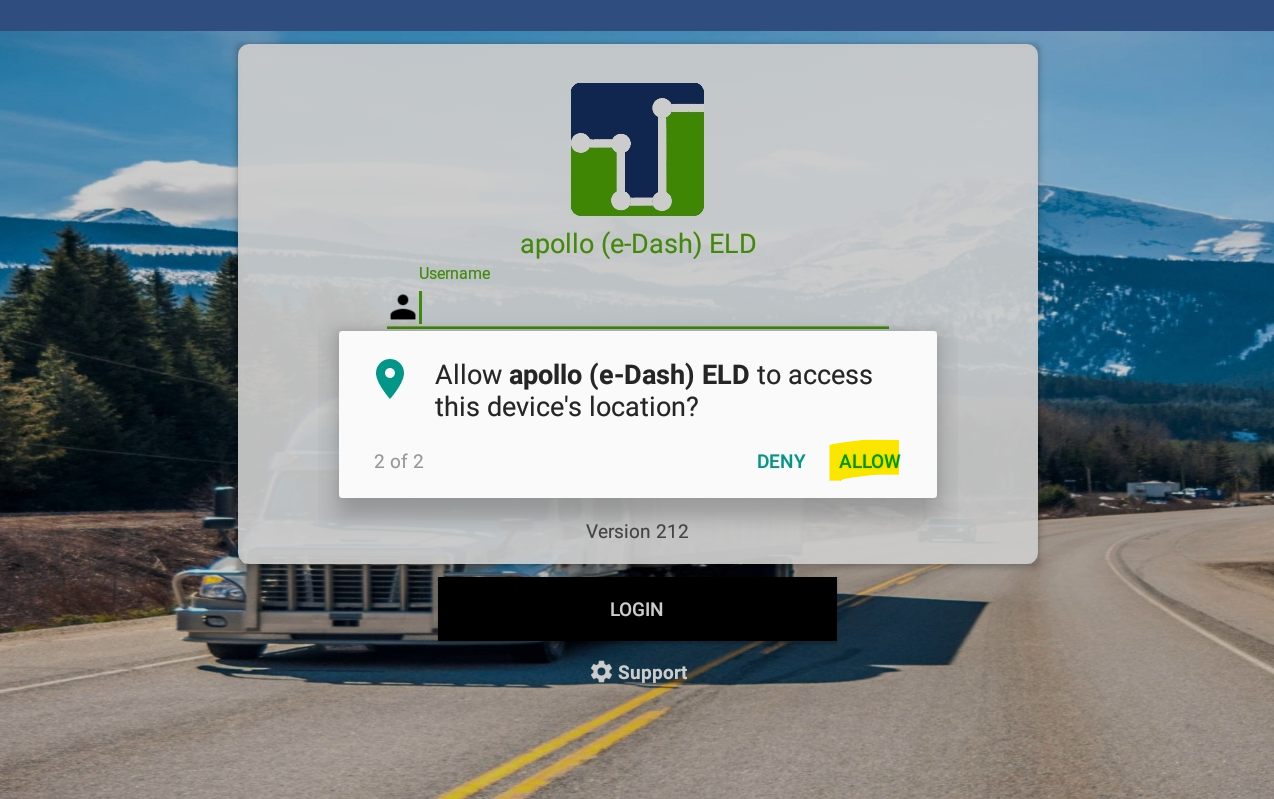
- "ALLOW" access for:
- Photos, media, and files on your device
- Your device's location
- Review and "AGREE" to permission information
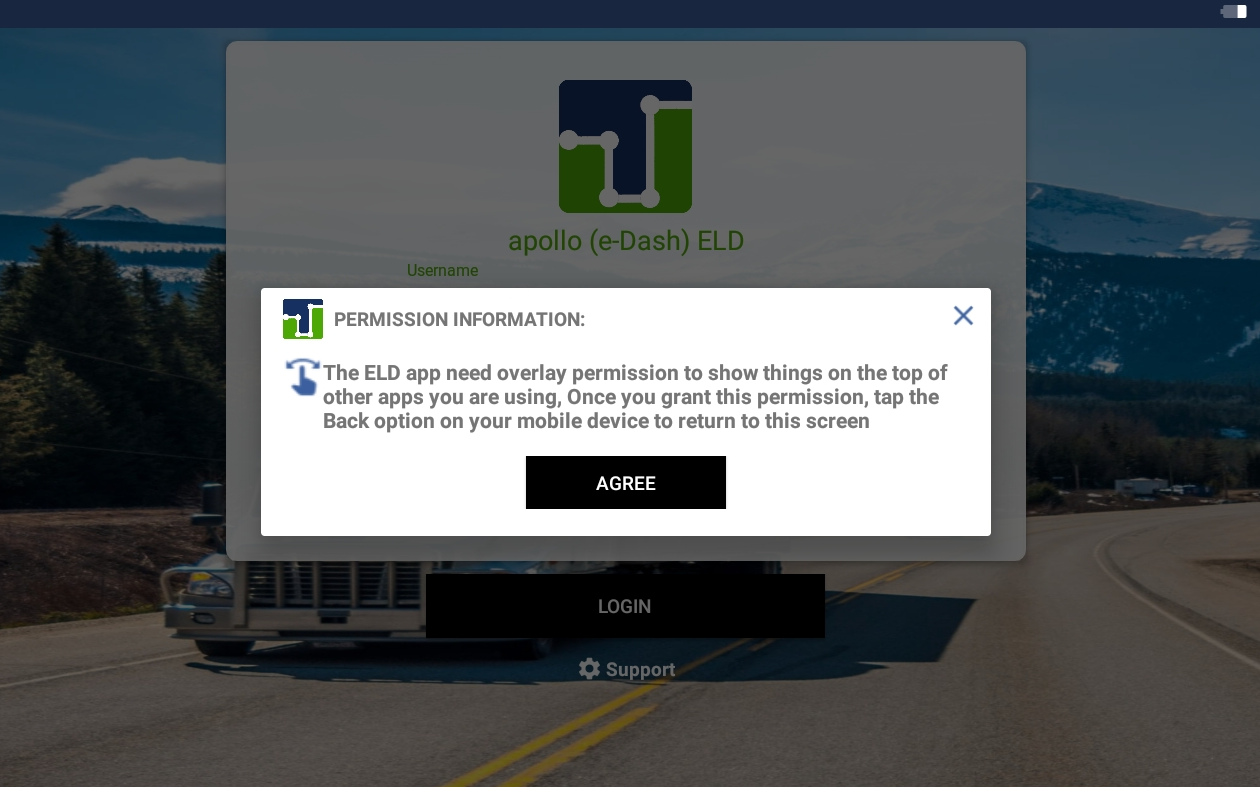
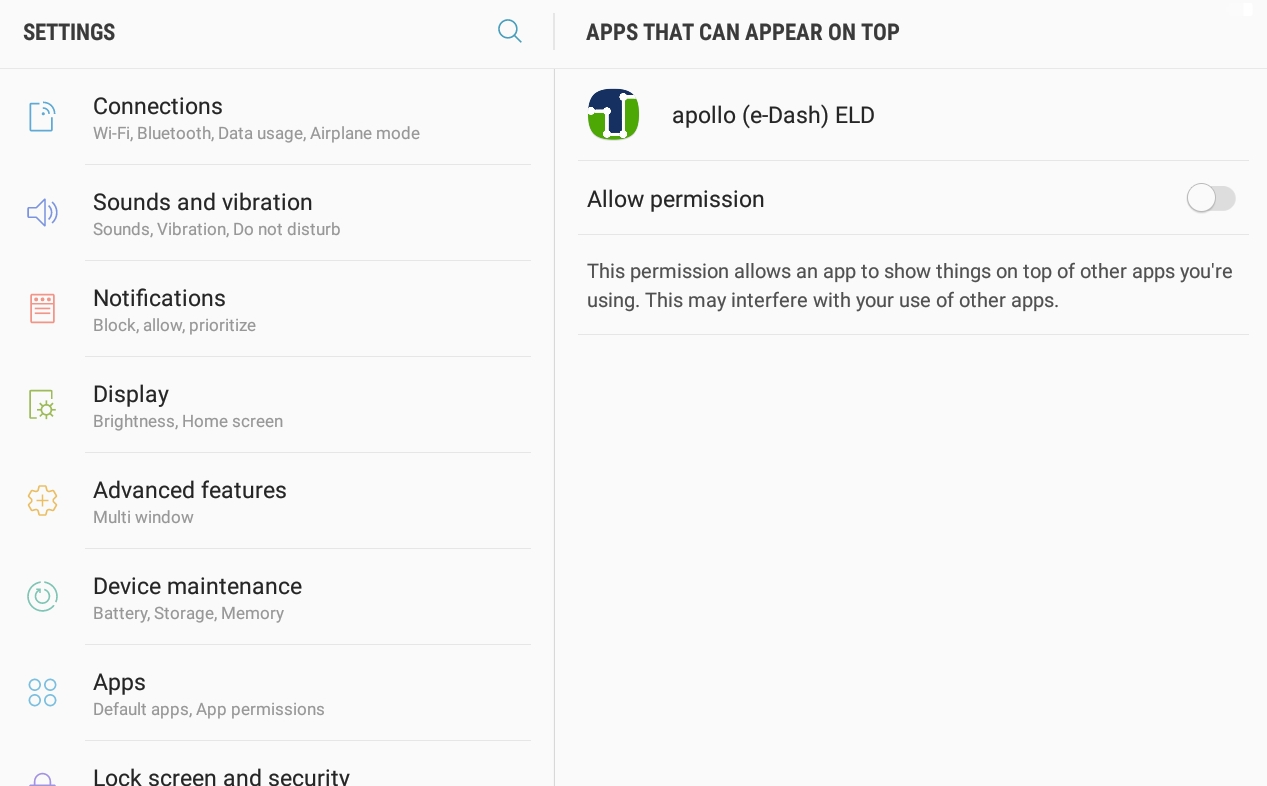
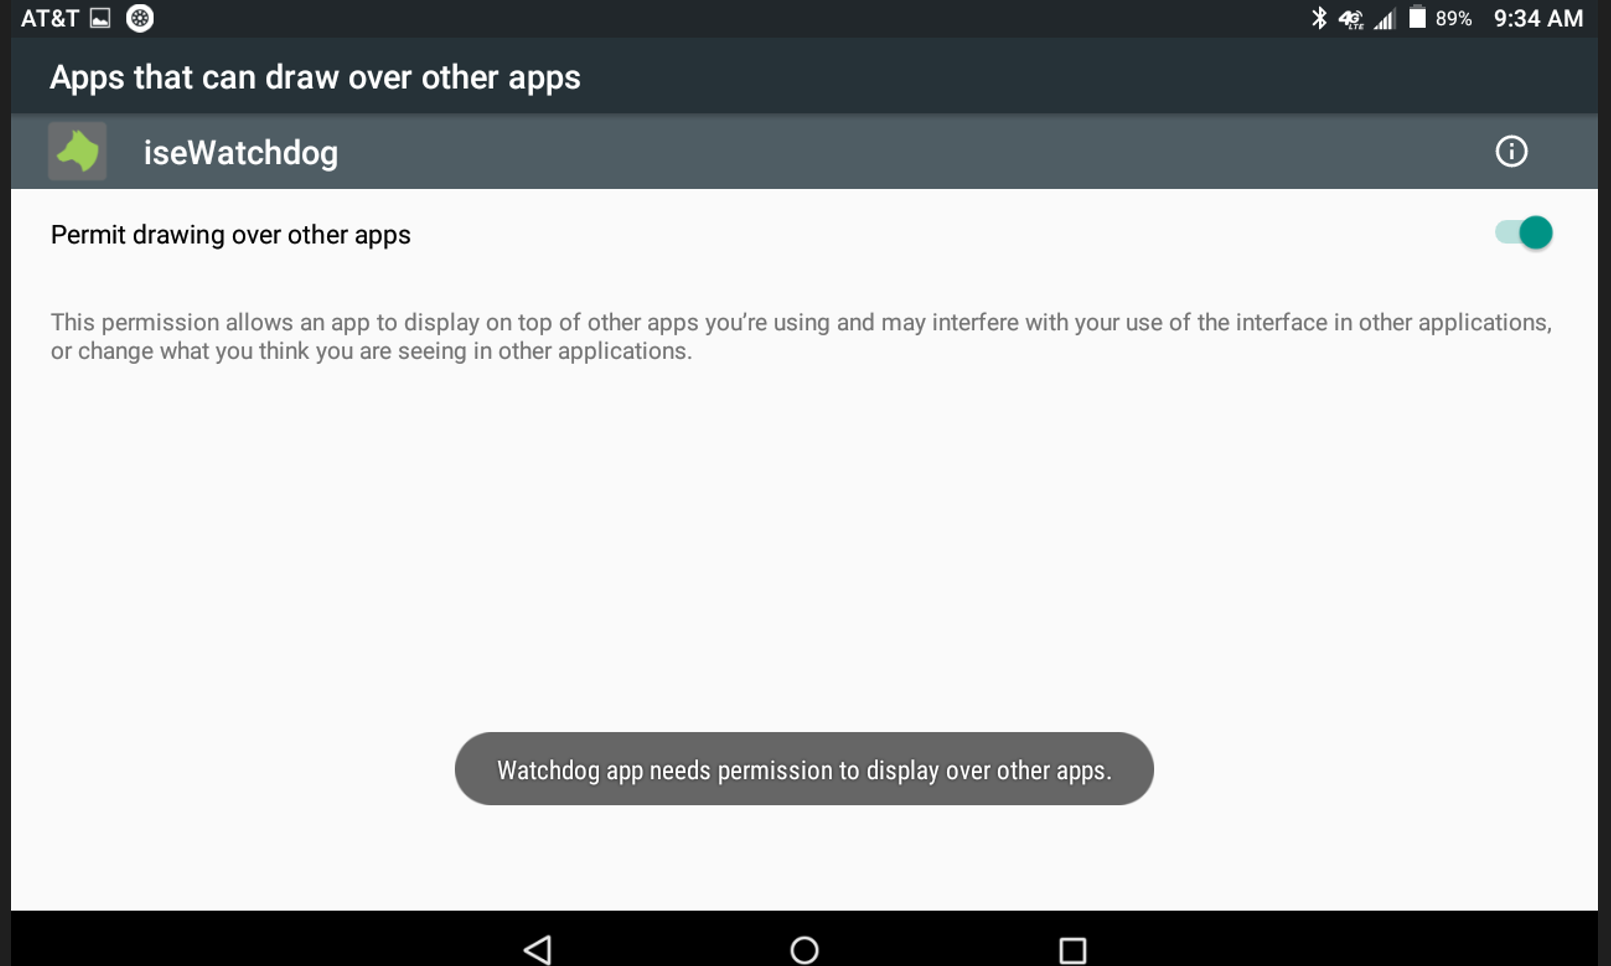
- Allow permission for Apollo ELD to appear on top of other apps.
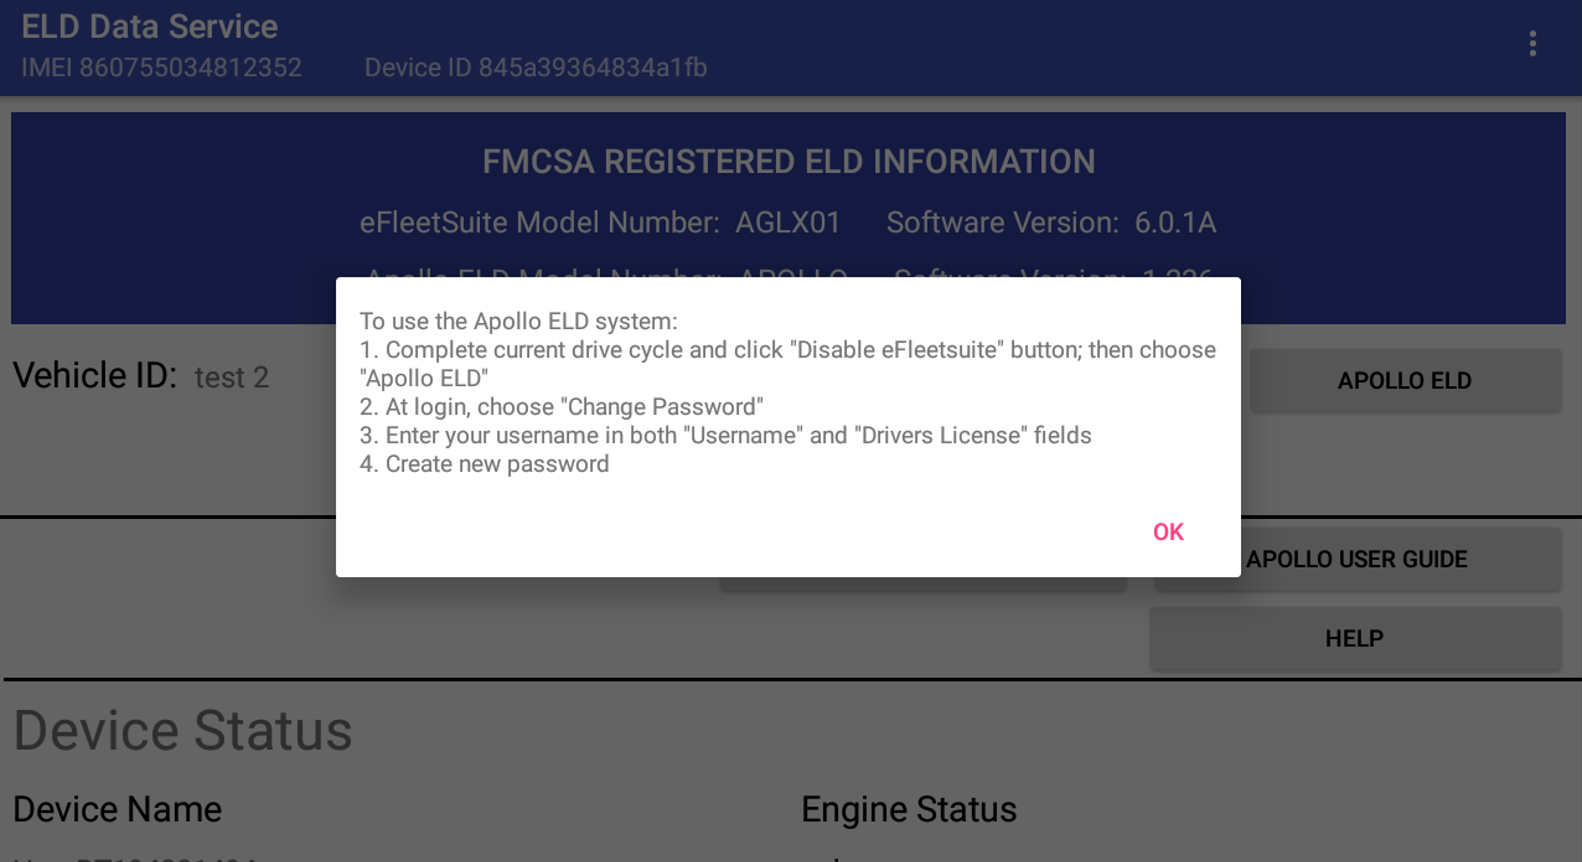
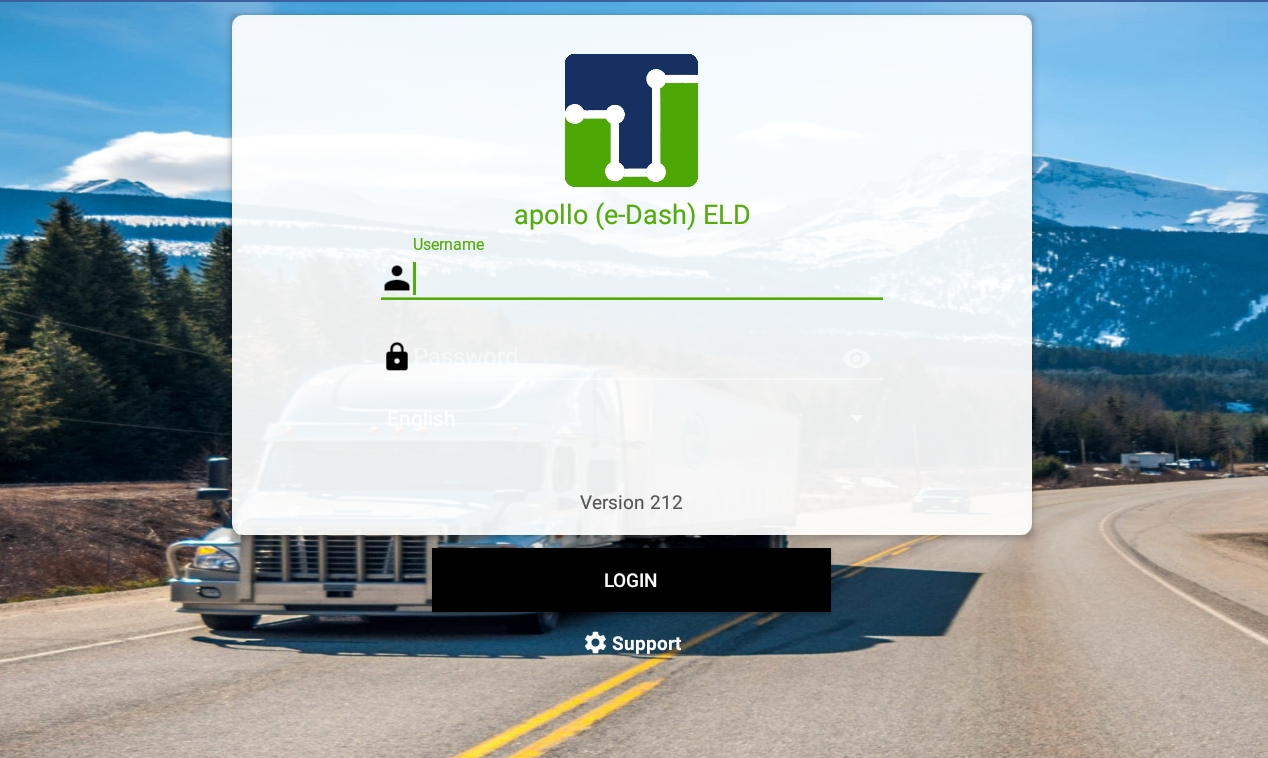
Logging into Apollo ELD for the first time:
- Click the back button to return to the login screen
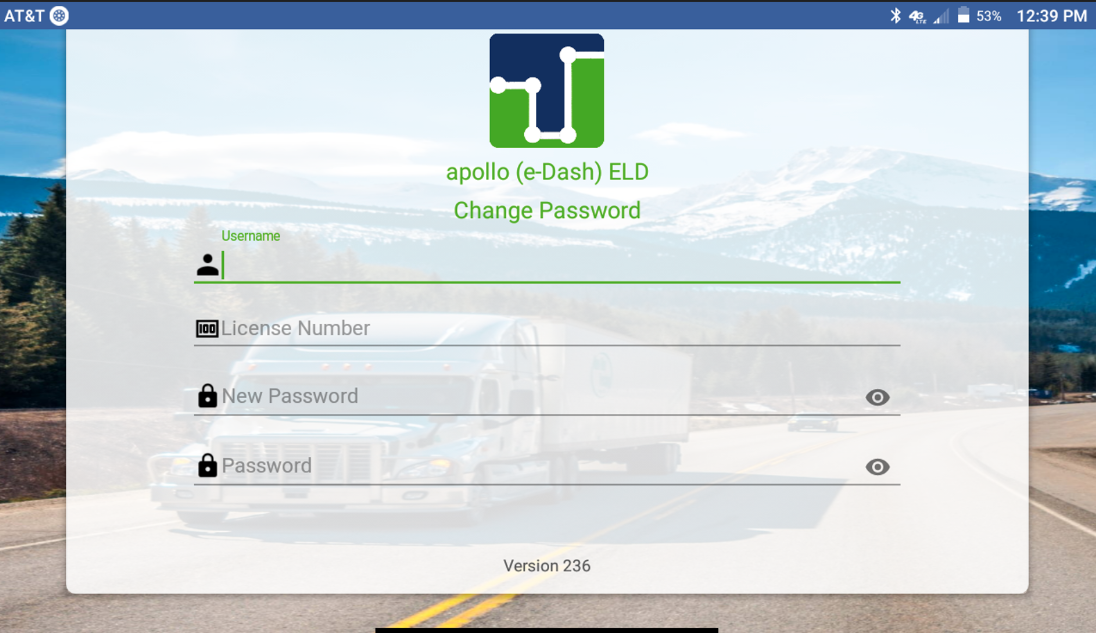
- Select "Change Password"
- Enter your eFleetSuite username in the "Username" field. Enter your eFleetSuite username followed by your company DOT# (i.e. jsmith12345678) in the "Driver's License" field.
Connecting your tablet to a JBUS device:
if this did not happen automatically
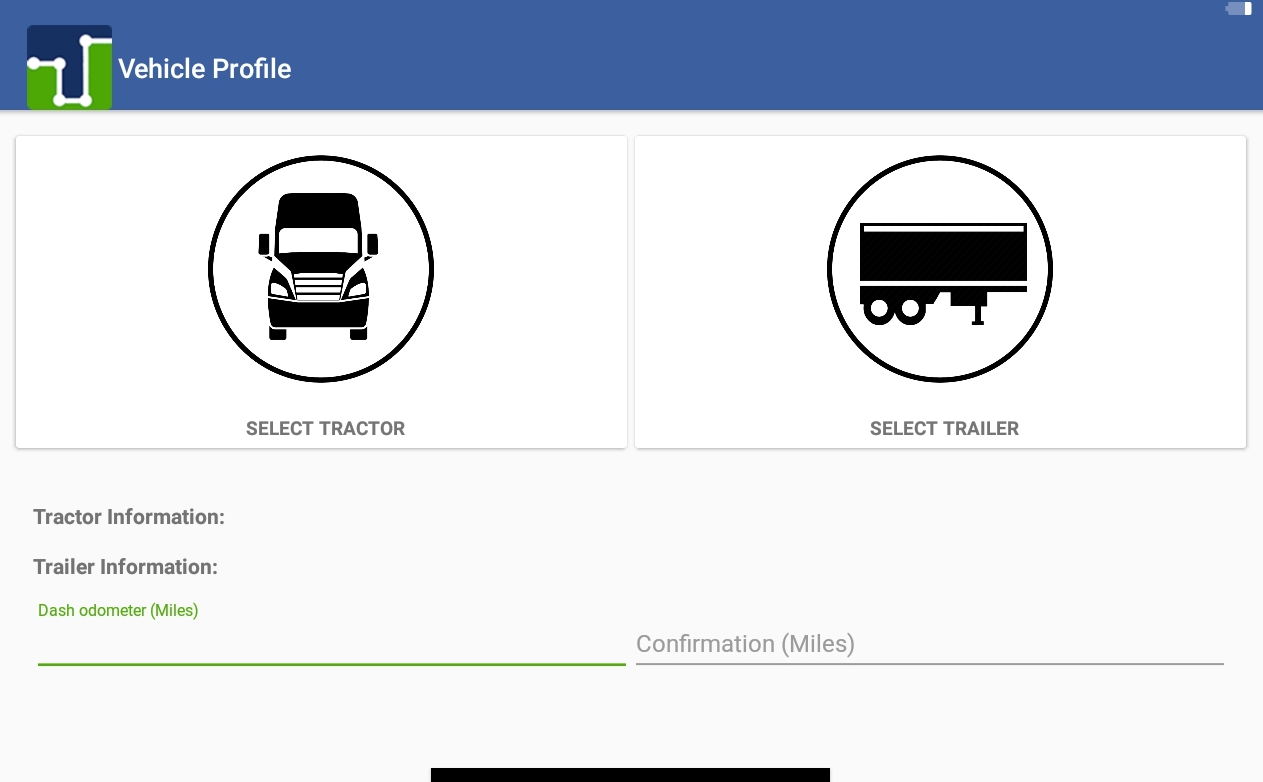
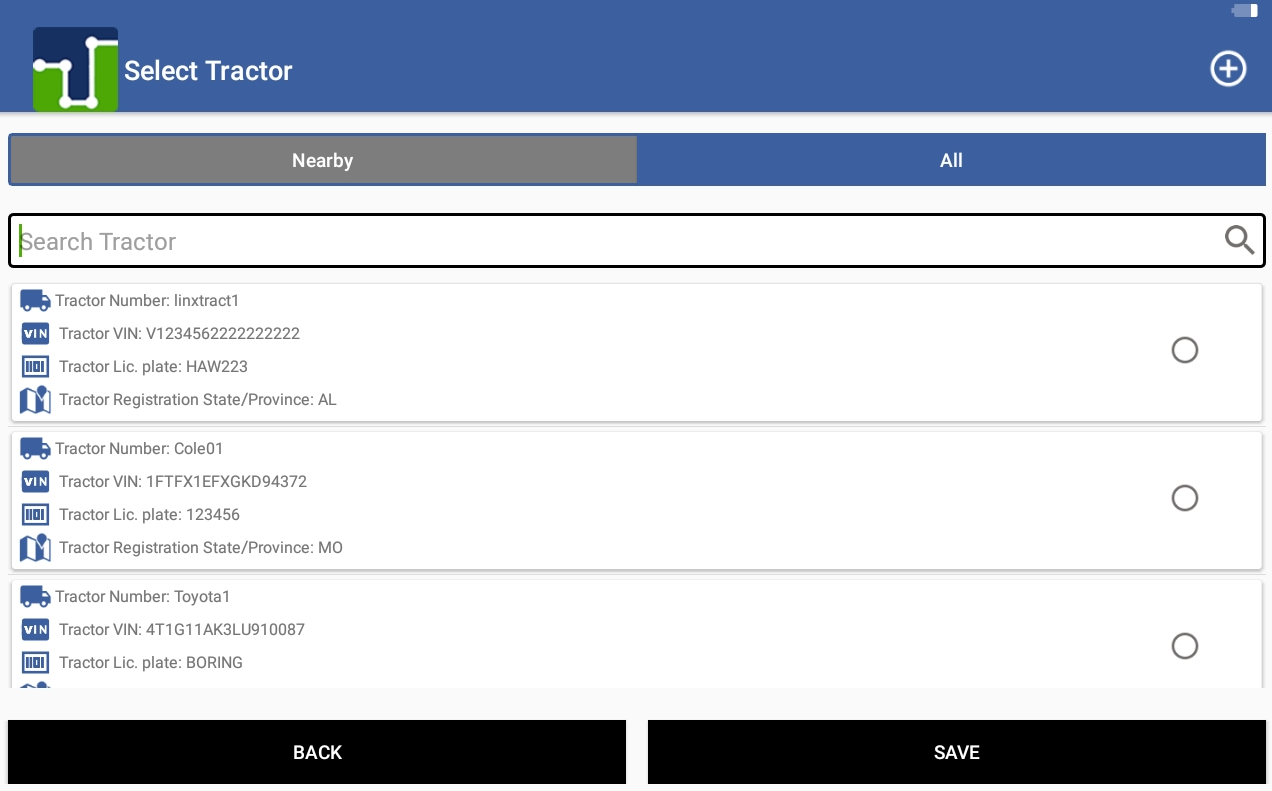
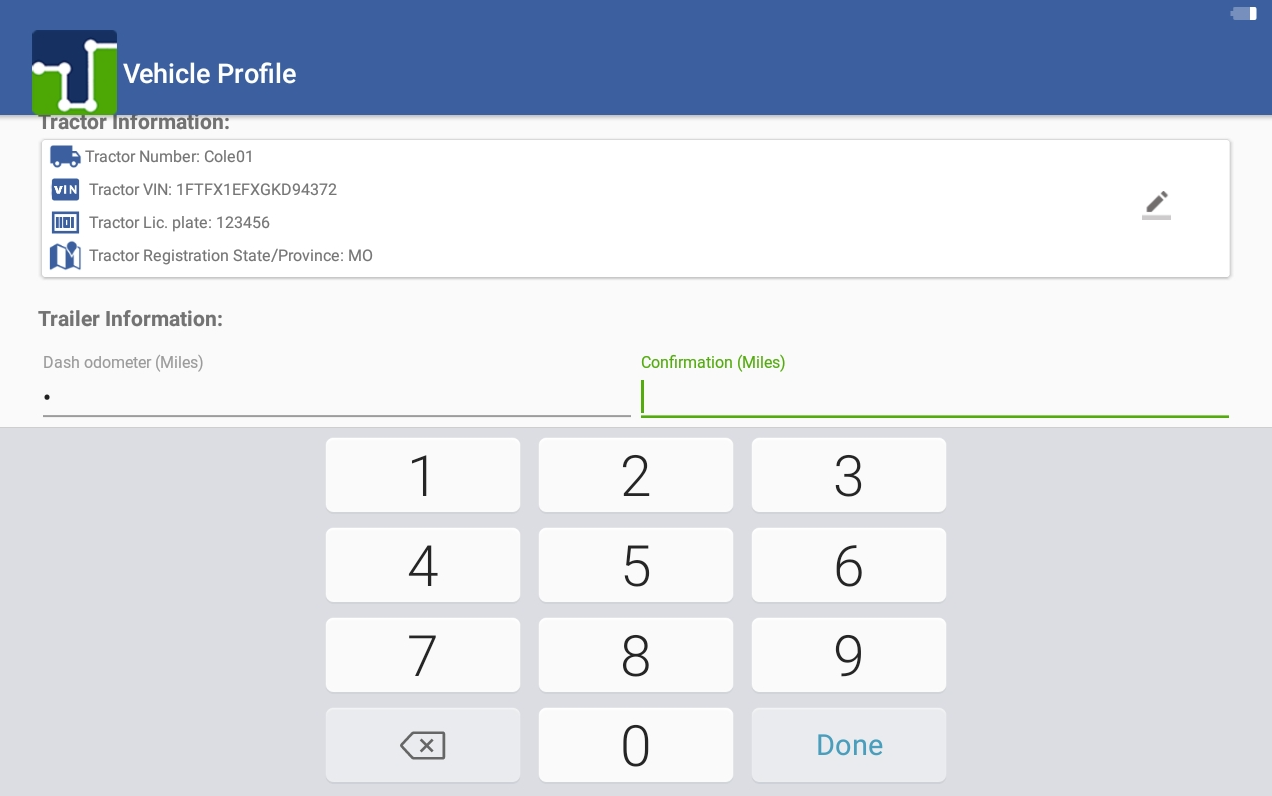
- When logging in for the first time you will need to select or create a vehicle profile.
- Update the vehicle profile information.
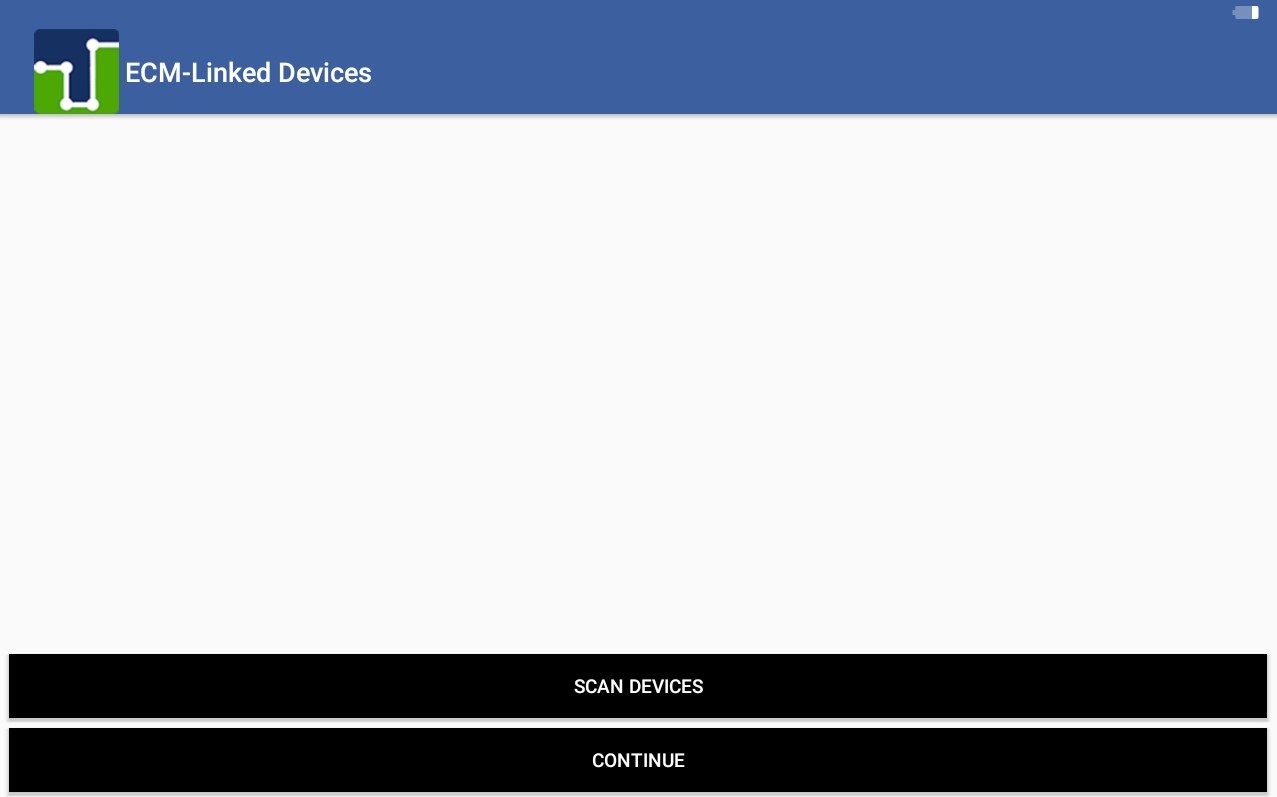
- After vehicle profile information has been entered you will need to pair the tablet with a JBUS device. Select “SCAN DEVICES” to find the JBUS device.
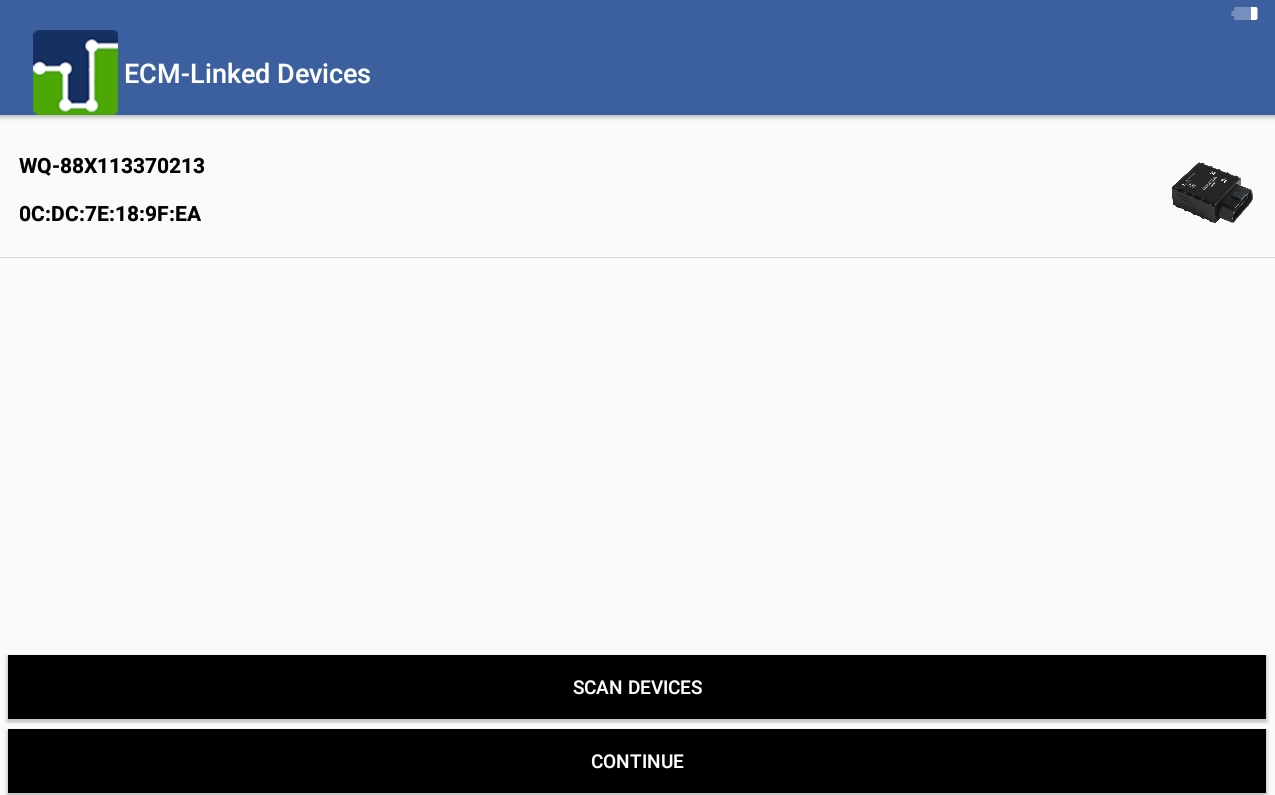
- Once the JBUS device has been found click on the correct device and select “CONTINUE”
- You will be taken to a Diagnostics screen. Select “RUN ELD DIAGNOSTIC” to confirm the tablet is receiving all information required from the JBUS device (all fields should be green)
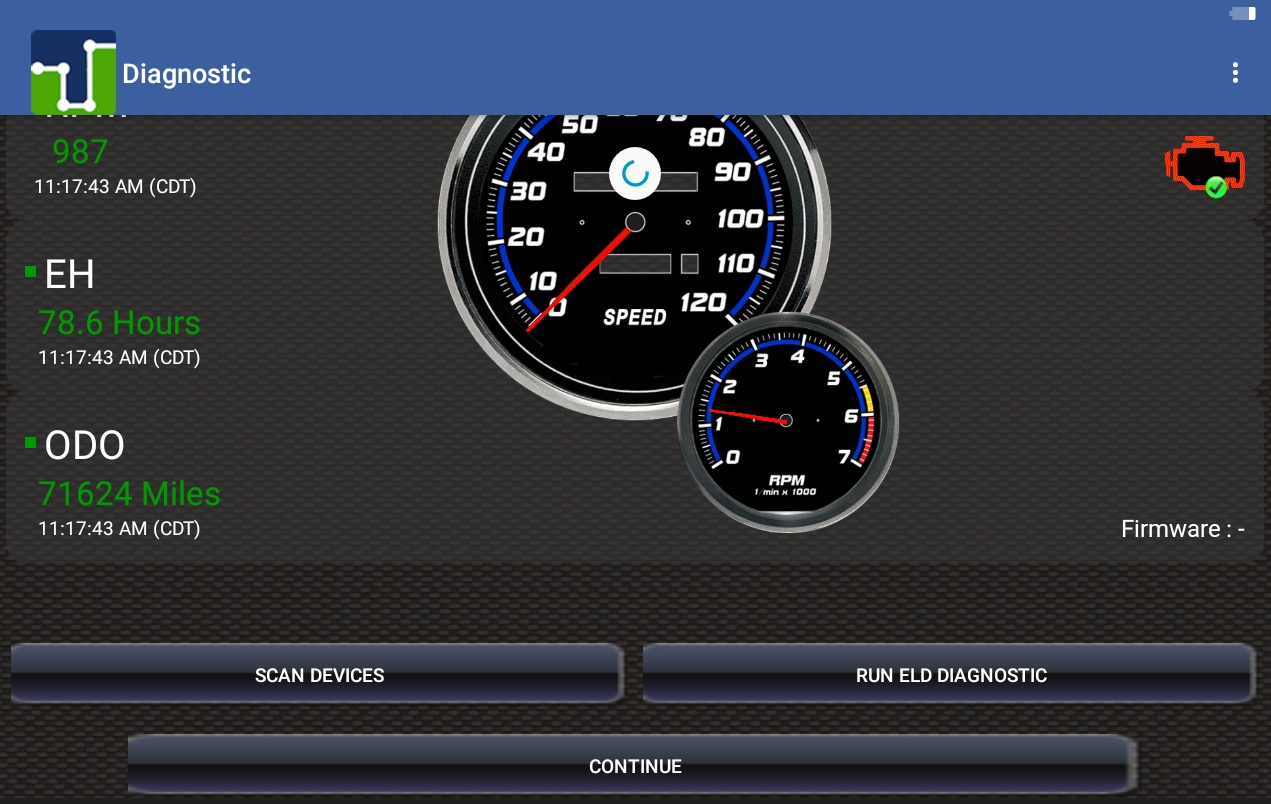
- Select "CONTINUE" to return to the homescreen
Steps to re-enable eFleetSuite
if it was disabled before your current duty cycle ends
NOTE: If you are currently on the Apollo ELD login
screen you will need to hit the back button on
your tablet to return to the DSA screen below.
- Select "ENABLE EFLEETSUITE"
- You will be prompted to allow iseWatchdog. Please select the toggle to allow.
- Click the back arrow to exit this screen to return to the DSA and log back into eFleetSuite.